Honey Oat Millet Bread courtesy of Ginger Lemon Girl
Okay, first of all, isn’t this picture funny, or is it just me? It’s like Dog’s Playing Poker!

Okay, now that I got that out of my system:
Today I am posting my version of a great bread by Carrie of Ginger Lemon Girl. Please go and check out her sites, they are wonderful. Ginger Lemon Girl is her food blog dedicated to all things gluten free. She even has a handy recipe index for you. You need to try the Ginger Lemon Muffins (when I make them, I sometimes don’t share with the kids!), Apple Berry Fruit Leather, Gluten Free Bagels, not to mention last year’s Thanksgiving and Christmas Cookie roundups.
Her other blog, Heart of a Servant, I also really enjoy. It shares more of her and her husband’s life and faith, and has some great frugal tips that we could all use. She also has instructions on how to make a Home Management Binder. Great, great tips!
I contacted her and asked if I could post my version of her Artisan Maple Oat Bread. When I make it dairy free, I simply replace the 3 tablespoons melted butter with 3 tablespoons olive oil. The biggest change that I do is HOW is make it. I use a sponge and then an extended rise time to really get it to puff up. I have liked using this technique on our gluten and dairy free breads as it really seems to make a nice product that stays fresher longer, seems to stay moister longer, rises well and seems to break down and mellow any strong flavors some of our flours seem to have.
When I first saw this bread. it reminded me of a bread that was my family’s weekly staple back in the gluten-filled days – a honey whole wheat. I had tried to replicate it without much success, at first mostly because gluten free oats were not to be had. But I was still struggling with the proportions of a gluten free version when I realized I could very easily convert Carrie’s recipe. So, thanks to her, our family has a new bread that reminds us of the “old days.” Thank you, Carrie! And thank you for letting me share this…
I have taken pictures of each step. I had to use a camera phone, so they aren’t the best photos, but hopefully you will get the idea. For a great step-by-step tutorial on baking gluten free bread, check out Carrie’s instructions. (Didn’t I tell you her site was a gold mine?!)
Honey Oat Bread – based on a recipe by Carrie of Ginger Lemon Girl (Artisan Maple Oat Bread)
Adapted by Angela Litzinger
Sponge:
1/4 cup plus 2 tablespoons warm water (for proofing yeast)
2 1/4 tsp. active dry yeast (Angela’s note: if doubling the recipe, I DO NOT double the yeast)
1/4 cup plus 2 tablespoons honey
1 1/2 tsp. white wine vinegar (Angela’s note: I usually use cider vinegar)
1 1/4 cups GF certified oat flour (I grind my oats in a blender)
Dry Ingredients:
3/4 cup millet flour
1/2 cup tapioca flour
1/4 cup + 2 Tbsp. brown rice flour
1 Tbsp. xanthan gum
1 1/2 tsp. salt
Wet Ingredients:
1/2 cup club soda, room temperature
2 eggs, beaten
3 Tbsp. butter, melted
Topping:
1 egg white (Angela’s note: If doubling, you DO NOT need to double this. There will be plenty for several loaves)
1 tsp. warm water (Angela’s note: If doubling, you DO NOT need to double this. There will be plenty for several loaves)
2 Tbsp. GF certified oats
Directions:
Put water into a mixing bowl. Sprinkle yeast on top. Let sit 5 minutes until bubbly. Mix in honey and vinegar. Mix in the oat flour until well blended and smooth. This will be pretty thick.
Cover the bowl and allow to stand on your counter from 2 to 4 hours.

This is the sponge.
When the sponge is ready (or when you are ready to deal with it), it should have bubbles throughout it.

The sponge after sitting. See the bubbles?

The sponge as being poured in… nice bubbles!
Whisk all dry ingredients together in the bowl of your stand mixer. To your sponge add the club soda, oil, and beaten eggs. Mix thoroughly.
On medium speed using the paddle attachment, slowly add wet ingredients to dry. Beat together for 5 minutes. Dough will be like a thick cake batter. (Angela’s note: I think it is much thicker than a thick cake batter. More sticky and heavy. Here’s a picture of the dough when mixed:)

Using a greased flexible spatula, gently scrape dough into prepared cake or bread pan and spread artistically into a large circle. Add artistic swirls if desired. Spray one side of a piece of plastic wrap with non-stick cooking spray and place loosely over dough.
Place covered dough into the refrigerator. Allow to rise. The dough should (at least) be doubled in bulk. This can take several hours. (Now, this sounds like a long time, but it gives you more control to bake when you are ready too. I can mix up this dough, place it in a pan, cover it in oiled plastic wrap in the refrigerator and go to piano lessons, or the grocery store, or read to my little one without worrying about it. Nice, huh? And the slow rise allows a nice flavor to develop.)

Before the dough rose (I smoothed the dough).

…and after. The dough is level with the top of the pan.
Remove dough from fridge and place on countertop still covered. Allow to sit for about 30 minutes to warm up a bit.
Preheat oven to 350 degrees (using an oven thermometer if necessary — correct oven temperature is very important in baking bread!)
Remove plastic wrap from dough. Mix egg white and 1 tsp. warm water together.. Gently brush over risen dough. Sprinkle GF oats artistically over the top of dough.

I also put slashes in mine.
Place in preheated oven and bake for 35-40 minutes (I usually bake for about 5-10 minutes more. I think because of the presoaked dough) until a toothpick inserted in the middle comes out with only a few crumbs. Let bread rest for 30 minutes on cooling rack before slicing. Enjoy!
(From Angela) one more tip I have for you: If you take some ice and put it on an old baking pan you don’t mind warping, and put it in the oven (on the bottom rack) with the bread (on the rack next one up from the bottom one), you will get steam in your oven which I find eliminates the weird hard top gluten free crusts can get sometimes.

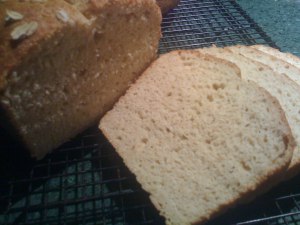
My completed bread. I doubled and made one round (8”) and one loaf (8 1/2” x 4”):


Thank you, again, Carrie, for letting me share this. And thank you for helping me figure out how to have a family favorite once again. Everyone else? Head on over to Ginger Lemon Girl and find out what a gift this talented blogger is to us!

Pingback: Menu Plan Monday - Gluten Free Dairy Free Christmas Edition | OAMC from Once A Month Mom
Pingback: Gluten Free Whole Grains | OAMC from Once A Month Mom